This one is a little long, so you may want to refill your coffee real quick and get cozy. You can click any of the thumbnails for a larger image if you’re having troubles seeing them. In yesterday’s post I gave a quick summary of the overall project we’re working on here, as well as some brief history behind the scene. If you haven’t checked it out yet, you can view it here in Part 1. For the first study of the group we’ll be working on Thymbraeus, the youngest of Laocoon’s sons and the first of them to die at the hands of the Gods.
At the time of starting this piece, I hadn’t really worked on anything in a while, so I wanted to start with the “easiest” figure of the group (that’s such a relative term) in order to warm up. While studying the entire sculpture and developing my plan I felt that Thymbraeus’ didn’t have quite as much definition in his anatomy and the angle I chose puts less emphasis on his face. That made it the perfect spot to begin my study since I’m still working on learning a lot of the underlying anatomy. But, with so little going on there, we’re still left with deciding what the most important part of his image is. Where is all of the tension? What portion makes the viewer feel the struggle that’s happening as the young man fails in the fight for his life? With his body mostly limp we can see that he’s in the process of using his last bit of life in an attempt to force the serpent away. That puts the critical point of this scene right there at the meeting of his hand and the serpent’s head. Ok, now we have a plan in mind for where this piece is going!!
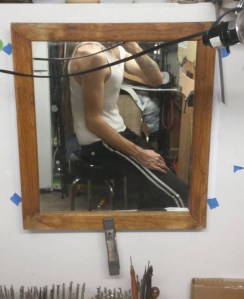
Now that we know where we’re going, it’s time to get setup for success (or failure at times, it all starts the same). I’ve enlarged our subject to the size that I want to work on and made sure that I’m happy with the composition. Since this is a study piece, my focus is on setting up for accuracy. That means I have to account for anything that might throw off my vision, most specifically alignment. If my reference is higher/lower than the piece I’m working on by even a small amount than my eyes tend to play tricks on me and tell me it’s not accurate. To avoid that, I spend a lot of time on the setup making sure everything is level and lined up. You may also notice the lack of clarity and detail in the reference photo. More on how that came back to bite me tomorrow.

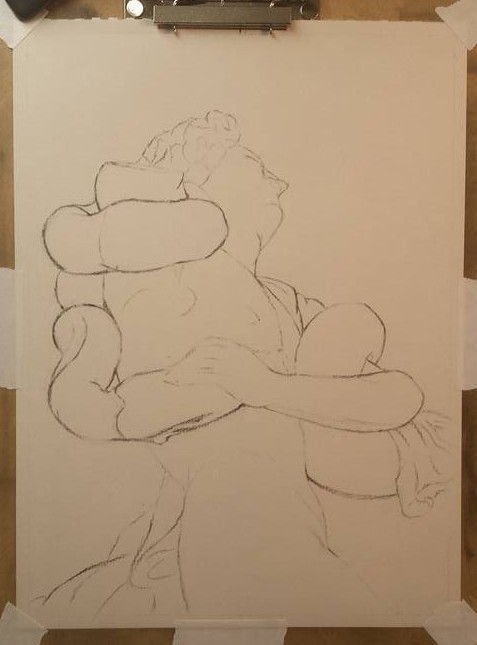
This is the part that really takes the longest for me. Remember that emphasis on accuracy? There’s always room for slight adjustments, but if the basic structure isn’t right and the proportions are off, then the entire piece will never come together. Since this one has so many curves in it from the snake we also have to spend a lot of time making sure that those come out believable. Luckily a snake is also organic, so any small errors here can be adjusted into a representation of the serpent’s natural movements. The first thing to note here is the overall structure. If you read yesterday’s post you’ll remember that I’m attempting to transform these into a human form rather than a copy of a sculpture. Then why is he without an arm!!!? I don’t have a really good insightful answer for that. The more accurate statement is that I’m going for something between sculpture and “human”. It essentially allows me to stay true to the piece without getting too caught up in creating forms that we really don’t know anything about. For centuries there was debate regarding where the arms were originally intended to be. The day Michelangelo participated in the unearthing of the sculpture (yes, this piece is that important) he formed his own ideas that contradicted common thoughts. Time has since proven him right on the father’s arm, but we still don’t have any clues about the missing pieces of the sons. So we’ll just leave them be with all of their missing parts.

Just a couple more notes on the above image before we move on to the next stage. Since I’m using this as a way to portray what’s happening in my head, I want to point out the reason for the different values in the lines. The majority of the differences here are based on the final outcome of the values. Most of the regions with dark contour lines are areas that will have darker values during the final rendering. That allows me to keep an eye on the overall forms as I’m building out my shading and focus my attention on the most important spots. As I stated in the beginning, I’m putting less of a priority on his facial features and head, so I’ve kept those lines fairly light here. Some of the other light portions (such as the drapery hanging off of him) are areas that I haven’t quite decided exactly what I’m doing with yet. By keeping the lines light I’m able to use them as temporary reference and go back later to refine them.
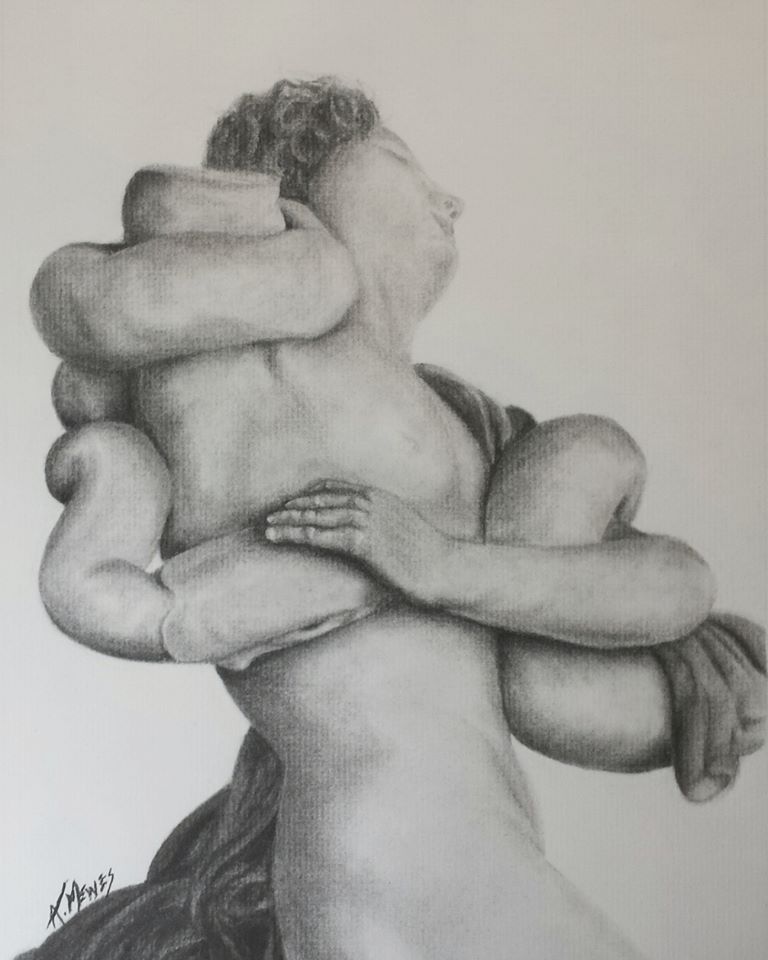
For the next stage I’ve spent a lot of time building out the value range and finding the anatomy. I tend to jump around quite a bit to avoid my natural tunnel vision. If I don’t, I’ll quite frequently find myself overworking a certain section because it just doesn’t feel right, when in reality it’s only a comparative issue since the surrounding portions aren’t there yet. So here you see I’ve built up some of the darkest areas we mentioned before and began lightly building out the muscle forms. I also further defined some of the drapery folds and began rendering his fingers. By this point we’re really starting to feel the power of the serpent squeezing on his body to render him lifeless.

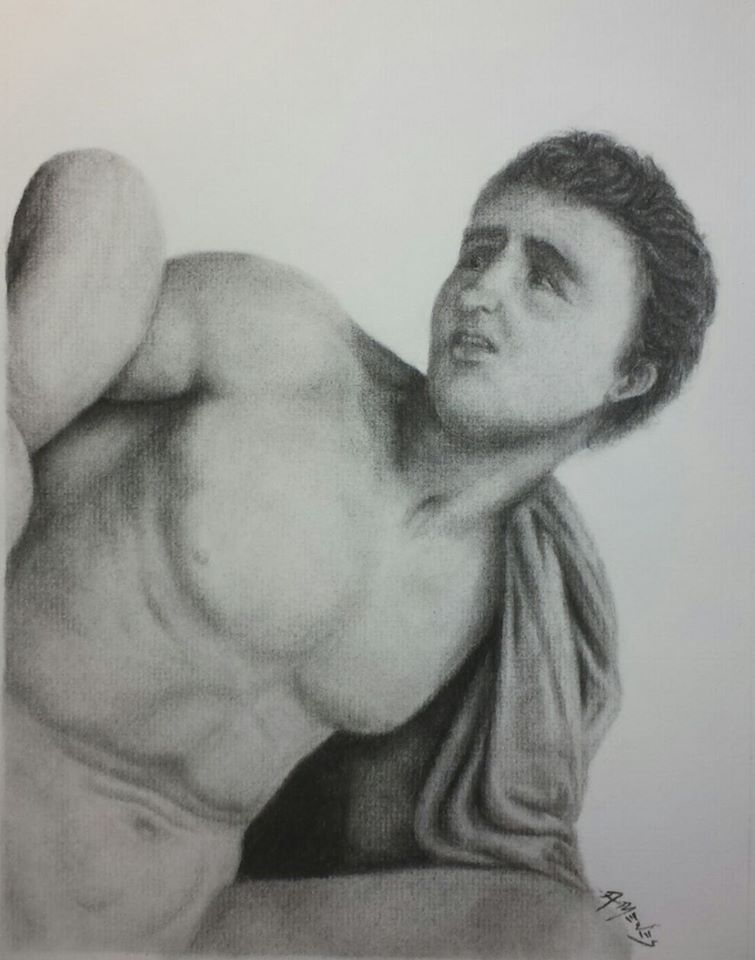
Up until now I’ve focused on overall progress images to really show how it all comes together. But, I want to take a moment to really focus in on the area that’s of the most importance to me, and the image. Throughout most of the image I mostly had to worry about relatively larger forms and value changes. But, in order to draw the eye into the central action, I had to put a lot more finesse and detail into his hand. If the hand weren’t the focal point, I probably would have left out of lot of the details and highlights in the joints and left it to the viewer’s eyes to fill in the blanks. But I really want the eyes to focus here, which is something we naturally do when there’s more detail involved. The hand isn’t quite complete at this point, and I was a little off on some of the anatomy in the bones, but you get a good idea of where it’s heading in terms of definition.
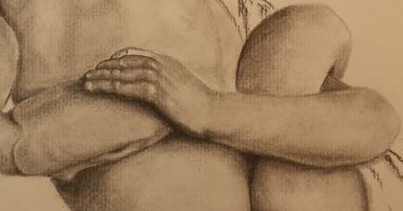
At this point, most of the base structure is complete and I’ve pretty much determined where I’m going with everything. There are still a few values to darken up again since they’ve naturally lightened in the process of creating smooth blending. We can also see the finished detail in the hand and how it relates to the piece as a whole. All that’s left now is to finish up the drapery and decide what to do with his hair.

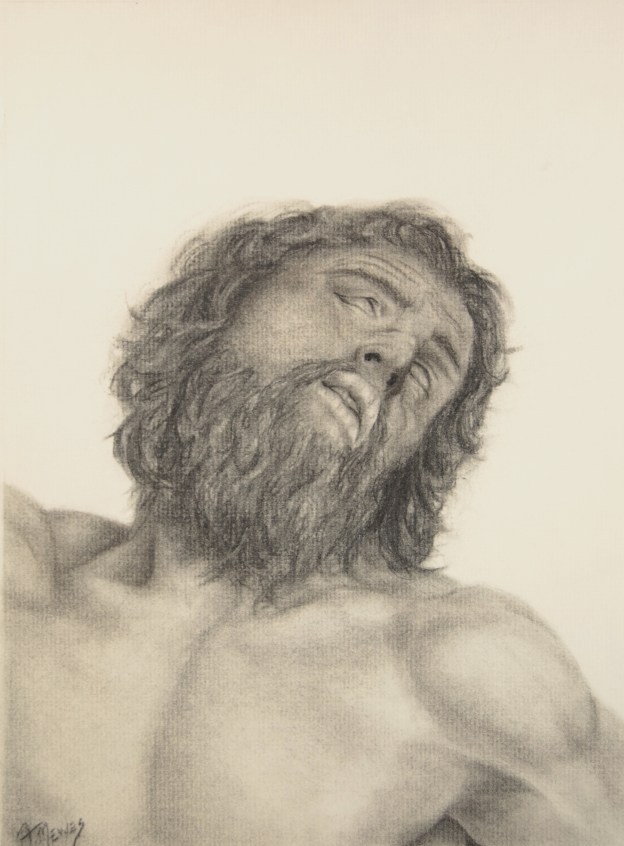
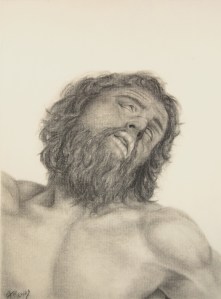
Remember that we’re shooting for an “almost human” interpretation of the sculpture. When I stop and look at many pieces in stone, I’ve always felt that there’s something a touch unnatural about the hair. Although it’s clearly full of curls, I just don’t feel it’s quite correct to portray it in groupings of curls they way it is. So, I decided to render curly hair in a form similar to what’s shown in the sculpture, yet believable as realistic hair that you’d see in life. In this image you can also see how I’ve extremely limited the details in his face and instead opted for implied features. His face really doesn’t have a whole lot to do with what’s happening in the scene, so I really wanted to avoid any emphasis there. You’ll also notice that I’ve lightened the values under his chin to maintain that separation.

And here we have it all completed with the final values. I hope this brings to light a lot of what’s happening in my head as I work. We usually don’t get the opportunity to see inside the thought processes that are happening as people create our favorite art. It’s fun to imagine that things just happen on a whim, but in reality there’s a lot of decision making going on that can both make and break a piece. I’ll try not to be quite so long winded on the rest of this series since you’ve really seen into the process on this one. If you’re interest, this one is currently available to purchase as a print in several sizes via my Saatchi Art page at www.saatchiart.com/allenmewes

Thymbraeus, Study for Laocoon And His Sons


You must be logged in to post a comment.